Writing Cross-posted from heartwoodmushrooms.ca
Fungi in the Garden: Reinventing Plant Pots (pt1)
A first attempt at making plant pots out of spent mushroom substrate bound by mycelium — the three-stage incubation, what the prototype actually looked like, and what's next.
This is a series on how to make better plant pots out of fungi, written by me — a mushroom cultivator with a proclivity for experimenting and making messes trying to figure things out.
“Better plant pots” doesn’t tell you much, but for the purpose of this series it means starting seedlings in containers that don’t contain plastic, aren’t imported from thousands of kilometres away, don’t require dredging out peat bogs, and degrade into the soil — adding nutrients along the way.
Teaching people how to make these pots via written word is hard. I want to give you practical frameworks and recipes, but there’s inevitably a lot of nuance and some specialized equipment involved in mushroom cultivation, and fundamental techniques that can’t be skipped. To some degree I have to relinquish attachment to making a comprehensive mushroom cultivation course and hope that the reader will navigate their own way through mycology.
This post is my first steps into working with the relatively new material mycelium-based composites, or MBCs, on my journey to making useful objects with it. MBCs are fibrous plant materials bound together by mushroom mycelium. I’m writing this for you should you want to follow along, and if you don’t, you’ll learn something new about the world of fungi.
Why buy something for $20 when you can spend $80 and 15 hours of your time to accomplish the same thing?
15 hours is probably a conservative estimate. Regardless, I’m pot committed (ha) now.
You see, I have a few plants at my home that I’ve needed to re-pot for way too long. One is in an old milk carton, another is in a broken-handled mug, others have just outgrown their container. You get the idea.
Anyways, I could go ALL the way to the hardware store and pick up a few pots and be done with it in a few hours, but that’s not how I roll.
It didn’t start with pots though.
Back in early December 2023, an industrial-design student at OCADU approached me asking if I could help him make a mycelium-based prototype for his research project. It’s a type of modular flat-pack furniture made from MBCs. He did wonderful research and design work but the prototypes he made weren’t up to snuff, and asked if I was up to the challenge. The kicker: it had to be delivered in 6 weeks.
“I’m in.”
Later that day, I was talking to my intrepid employee, Cynthia, about how to approach this project. I mentioned trying to find hemp or sunflower stalks locally and shredding them down, then inoculating them in the right shape. Cynthia casually says, “Why not use the substrate after the mushrooms have grown? We just compost it out back.”
Well, shit. That sounds like a fantastic idea.
All I need to do is learn how to make this stuff.
After reading a half-dozen academic papers on MBCs, I learned that there are 4 important elements to making them:
- The material needs to be incubated 3 times
- Add some wheat flour before the 2nd incubation
- Density matters a lot. The more dense, the stronger the product
- The mycelium needs to be deactivated in an oven or large dehydrator
Let’s unpack this three-stage incubation bit.
First incubation (~2 weeks): the base material, or substrate, needs to be completely myceliated. We hydrate, sterilize and inoculate our material in special breathable, autoclavable bags. This step is standard — it’s what we do for normal mushroom production.
Second incubation (4 days): break up the material, mix with some flour, and pack into whatever shape or mould you want. At this point, you want to compress the substrate as much as possible to make it as dense as you can. The flour gives the mycelium enough energy to knit the mycelium together in the new shape.
Third incubation (4 days): remove the object from the mould and place into a high-humidity environment. This stimulates the organism to create a protective layer of mycelium on the outside, which helps keep the object together.
After these three steps, the mycelium needs to be heated and dried. This makes the strength go up, and also prevents the organism from growing mushrooms in the future.
Most of the papers used Oyster or Reishi mushroom mycelium for their speed of growth and desirable strength properties.
OK, seems simple enough. Let’s make a mess.
I made a crude mould out of a flimsy wooden box you sometimes get strawberries in at a farmer’s market for the outside, and a large Mason jar for the inside.
After mixing the substrate with some flour, I lined the wooden box with plastic wrap and laid down a layer of substrate. Then I set the jar on top and packed it into the space between the wooden box and the jar with more substrate.
I used a spoon to compress it as much as I could. I covered the substrate with the excess plastic wrap, trapping in moisture.
Next, I continued with the process I outlined above.
In short, these are the steps I followed to make the plant-pot prototype:
- Break up spent mushroom substrate, mix with flour at 3 % by weight
- Pack tightly into mould
- Incubate 4 days
- Remove from mould and place in high-humidity environment
- Incubate for 4 days
- Deactivate mycelium by cooking in toaster oven at 250 °F for 4 hours
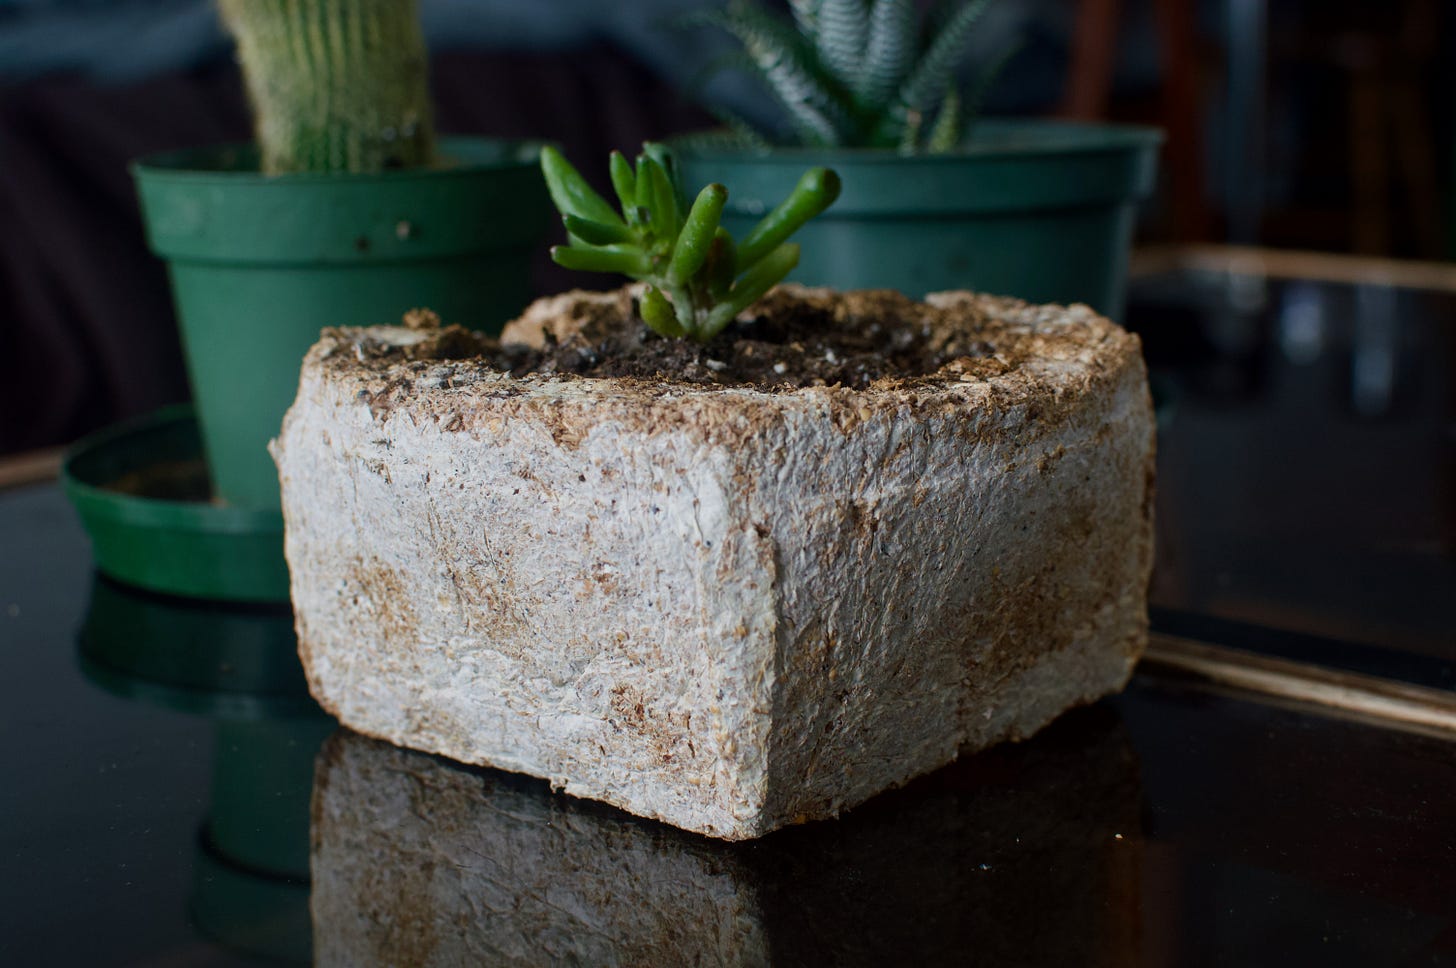
The result
It was more solid than I expected. Curing it really locked the mycelium and substrate together. I noticed some small cracks — maybe it dried too quickly. The top edge was also a bit crumbly. I think having a solid surface to press against would help prevent that. I also think tuning the 3rd incubation to grow a thicker mycelium outer layer would help.
I think the strength is fine for small objects like this, but I’ll need a different material for the OCADU prototype. To maintain MBC strength, the cellulose in the substrate must remain undigested. This means minimizing incubation time. The spent substrate has not only been incubated for weeks but also actually been growing mushrooms. By the time I’m using it to make MBC it’s lost a lot of its strength because it was digested and turned into mushrooms.
That will be the topic of Part 2 of this mini series.
It may seem like I’ve jumped around a bit with my goals. I lead with “a new way to grow vegetables,” then I talk about this non-food OCADU project, then I recap my process making indoor plant pots. What’s going on?
Great question.
I’m in a very exploratory phase right now, which means my mind is jumping around and making new connections. I need to get reps in and learn how to work with these materials and processes. I’m very project-driven, so having a thing to work towards helps set the focus and constraints.
I have several aspirations with MBCs that are different branches of the same trunk. By that I mean a lot of the processes and equipment I use to achieve these goals will be the same. There is reusable overlap.
Here is my current version of my roadmap:
- Make a prototype pot from spent substrate
- Deliver composite prototype for OCADU project on time
- Make commercial seedling pot from spent substrate
- Create a shipping packaging for our glass mushroom-extract bottles
- Create sturdy indoor flower pots that can last 2 years at a minimum
- Create a garden planter box
- Create blocks/panels to make a dome (because domes are cool)
These projects blend the worlds of mushroom cultivation, biology, material science and design, which stimulates my neurons in a pleasant way.
But I’m doing this because I believe it will help make our experience on Earth a bit better, reducing the amount of plastics, chemical processes and transportation required for us to grow food.
I don’t exactly know where this is going yet, but I’m excited. I need to do customer research by talking to nurseries, greenhouses, and home gardeners. I’ve done some gardening over the past decade but not a whole lot — I’ve been hardcore mushrooming.
Shane